Apex Designer is a low-code design tool that generates an app that runs on an open source stack. For the server-side app, it generates a Loopback node.js application. A Loopback application can be a "mash up" of several data sources using different connectors including lots of sql and no-sql databases. But a datasource can also be a SaaS application like Box, AWS Simple Email Service, and the Camunda Process engine.
The low-code environment of Apex Designer makes it easy to use connectors like these by simply adding one of the pre-built libraries and configuring the connection credentials. This post is for anyone that wants to understand what is under the covers of an Apex Designer integration library. It can anyone interested in building Loopback connectors. I will walk through the steps I took to build a Google Drive Library to support an onboarding process that includes generating, collaborating and signing contracts.
Create a Library
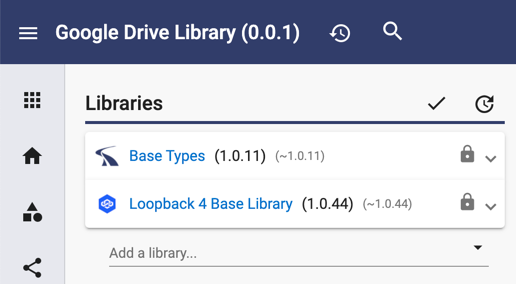
I created an empty Apex Designer project called Google Drive Library and set the project logo and description. I also added the Loopback 4 Base Library. I skipped the Angular-related libraries for now because this library does not have any UI components.
Create a Test App
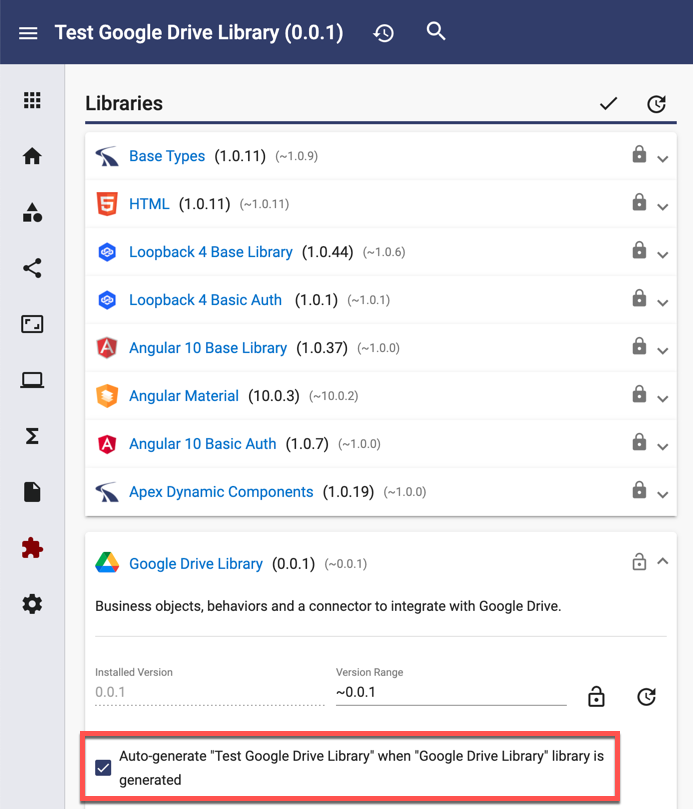
I created an application called Test Google Drive Library using the Angular 10 and Loopback 4 Template Project. I added the Google Drive Library as a dependency and checked the box to have the test app regenerate any time the library is generated.
Create a Connector
Creating a Loopback connector is a "pure code" part of the low-code experience. Apex Designer allows you to edit generated code as well as add new code alongside the generated code.
Ideally, a connector should be a separate npm package, but in this case, I created it directly in the project. I went to /files/loopback/src/datasources and created a file called "google-drive.connector.ts".
The top of the file is straightforward. It sets up the debug module, pulls in the googleapis package, declares the class and constructor:
const debugClass = require('debug')('GoogleDriveLibrary:GoogleDriveConnector');
debugClass.log = console.log.bind(console);

const { google } = require('googleapis');

export class GoogleDriveConnector {

	dataSource: any;
	settings: any;

	client: any;
	docs: any;
	drive: any;

	constructor(settings: any) {
		const debug = debugClass.extend('constructor');
		debug('settings', settings);
		this.settings = settings;
	}
The connect method handles authentication. It gets the credentials JSON from the data source settings, parses them, creates a JWT client, authorizes it and sets up the drive and docs apis:
async connect(callback?: Function) {
	const debug = debugClass.extend('connect');

	try {
		debug('this.settings %j', this.settings);
		debug('this.settings.googleApiCredentialsJson %j', this.settings.googleApiCredentialsJson);
		if (!this.settings.googleApiCredentialsJson)
			throw {
				message: `The googleApiCredentialsJson setting is required required.`,
				statusCode: 500
			};

		const keys = JSON.parse(this.settings.googleApiCredentialsJson);

		this.client = new google.auth.JWT(keys.client_email, null, keys.private_key, [
			'https://www.googleapis.com/auth/documents',
			'https://www.googleapis.com/auth/drive'
		]);
		debug('client created');

		await this.client.authorize();
		debug('authorized');
		this.docs = google.docs({ version: 'v1', auth: this.client });
		this.drive = google.drive({ version: 'v3', auth: this.client });

		if (callback) callback();
	} catch (err) {
		debug('err', err);
		err = new Error(err.message);
		err['statusCode'] = 500;
		if (callback) {
			callback(err);
		} else {
			throw err;
		}
	}
}
The "all" method is the "read" or "find" method in a Loopback connector. Here is a starter version of the method. It only handles the File model and only does single id, a list of ids or all of the files:
async all(modelName: string, filter: any, callback: any) {
	const debug = debugClass.extend('all');

	debug('modelName', modelName);
	debug('filter %j', filter);

	try {
		if (!this.client) await this.connect();

		if (modelName === 'GoogleDriveFileModel') {
			if (filter && filter.where && filter.where.id) {
				const valueType = typeof filter.where.id;
				if (valueType == 'string') {
					let result = await this.drive.files.get({
						fileId: filter.where.id
					});
					debug('result.data %j', result.data);

					callback(null, [result.data]);
					return;
				} else if (valueType == 'object' && filter.where.id.inq) {
					let result = await this.drive.files.list({
						pageSize: 1000
					});

					let matchingFiles = result.data.files.filter(
						(doc: any) => filter.where.id.inq.indexOf(doc.id) > -1
					);
					debug('matchingFiles %j', matchingFiles);

					callback(null, matchingFiles);
					return;
				} else {
					return callback(new Error(`Invalid id filter`));
				}
			} else {
				let result = await this.drive.files.list({
					pageSize: 1000
				});
				debug('result.data.files %j', result.data.files);
				callback(null, result.data.files);
				return;
			}
		} else {
			return callback(new Error(`Model "${modelName}" is not supported`));
		}
	} catch (err) {
		debug('typeof err', typeof err);
		debug('err.message', err.message);
		err = new Error(err.message);
		err['statusCode'] = 422;
		callback(err);
	}
}
The rest of the loopback filter options will be mapped to Google API call options in a later iteration of this connector. The id-related filters are sufficient to demonstrate relationships with other models in a mashup.
There are also other methods that the connector may implement in the future. Here is the full list of methods from the Loopback documentation:
- connector.create
- connector.updateOrCreate (optional, but see below)
- connector.replaceOrCreate (a new feature - work in progress)
- connector.findOrCreate (optional, but see below)
- connector.buildNearFilter
- connector.all
- connector.destroyAll
- connector.count
- connector.save
- connector.update
- connector.destroy
- connector.replaceById (a new feature - work in progress)
- connector.updateAttributes
Create a Data Source
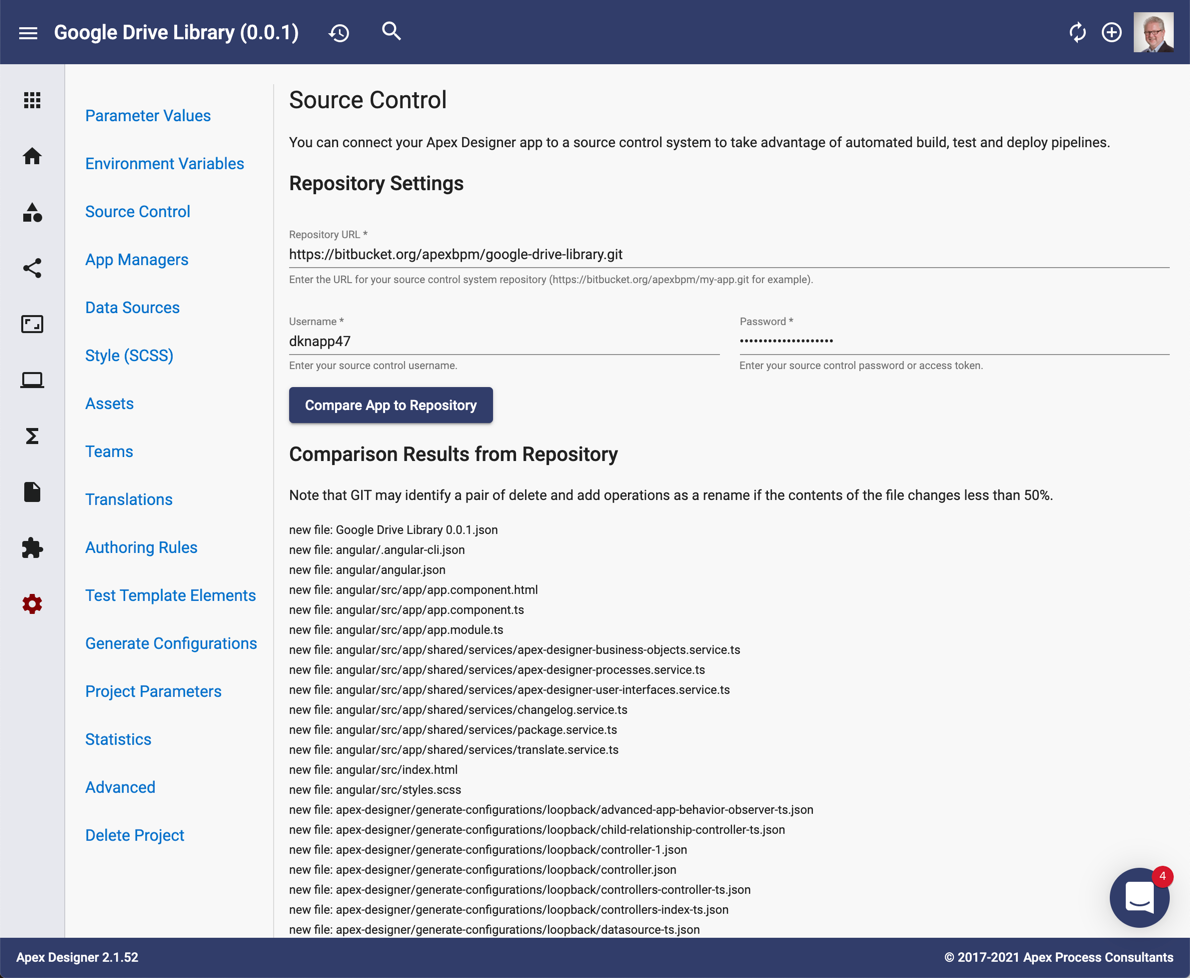
Normally in Apex Designer, you create a data source in the project settings like this:

In this case, because the connector is in the app sources itself, we edit and override the "/loopback/src/datasources/google-drive.datasource.ts file as shown here:
import { inject, lifeCycleObserver, LifeCycleObserver } from '@loopback/core';
import { juggler } from '@loopback/repository';
import { GoogleDriveConnector } from './google-drive.connector';

const config = {
	name: 'google-drive',
	connector: GoogleDriveConnector,
	googleApiCredentialsJson: process.env.googleApiCredentialsJson
};

@lifeCycleObserver('datasource')
export class GoogleDriveDataSource extends juggler.DataSource implements LifeCycleObserver {
	static dataSourceName = 'google-drive';
	static readonly defaultConfig = config;

	constructor(
		@inject('datasources.config.googleDrive', { optional: true })
		dsConfig: object = config
	) {
		super(dsConfig);
	}
}
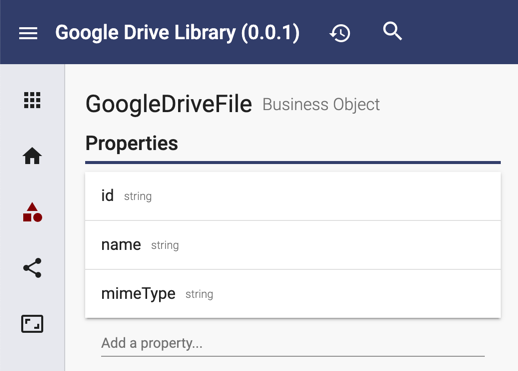
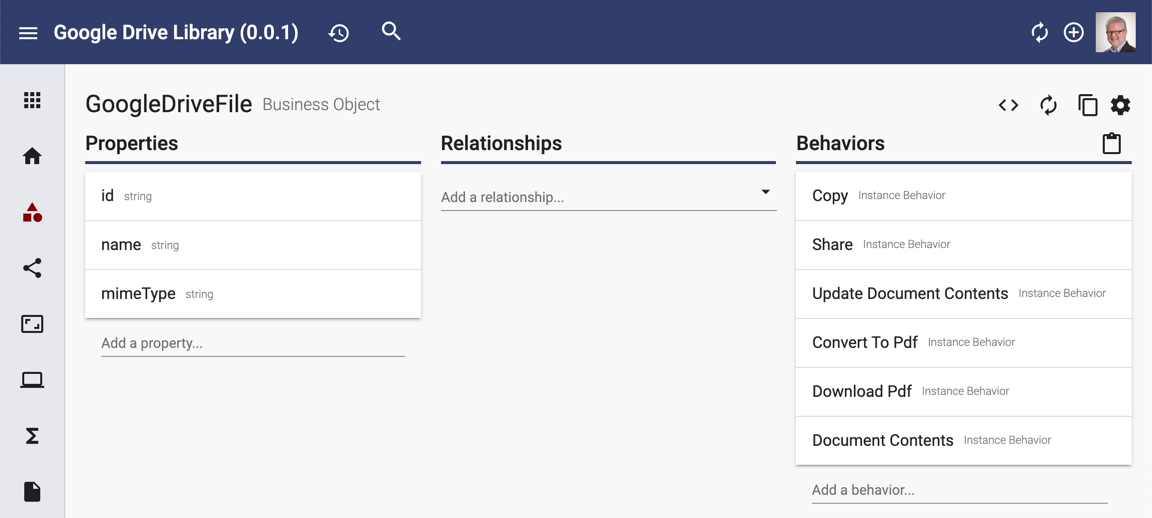
Create a Google Drive File Business Object
Now that we have a connector and a data source, we can create the business objects for the library. For this post, we will focus on the Google Drive File business object. We add id, name and mimeType properties. These form the subset of the Google Drive File resource that we are interested in for now.
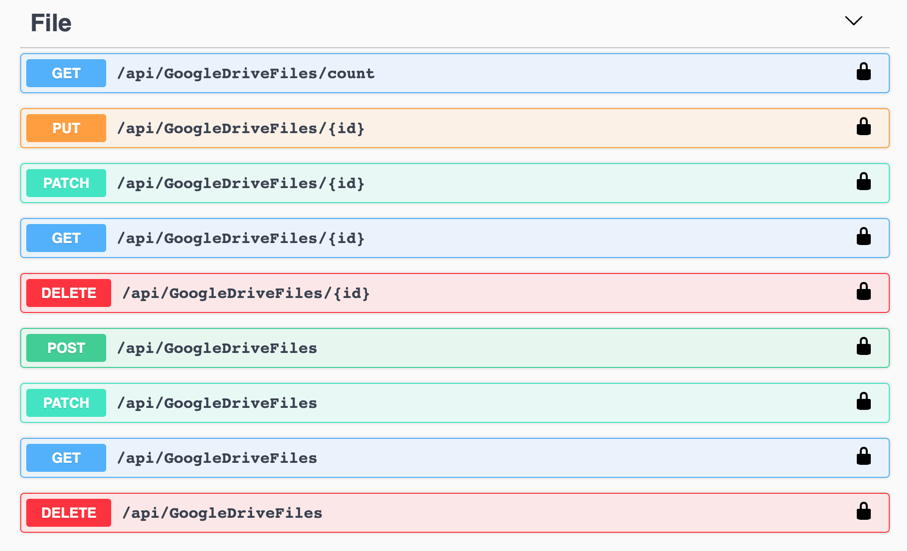
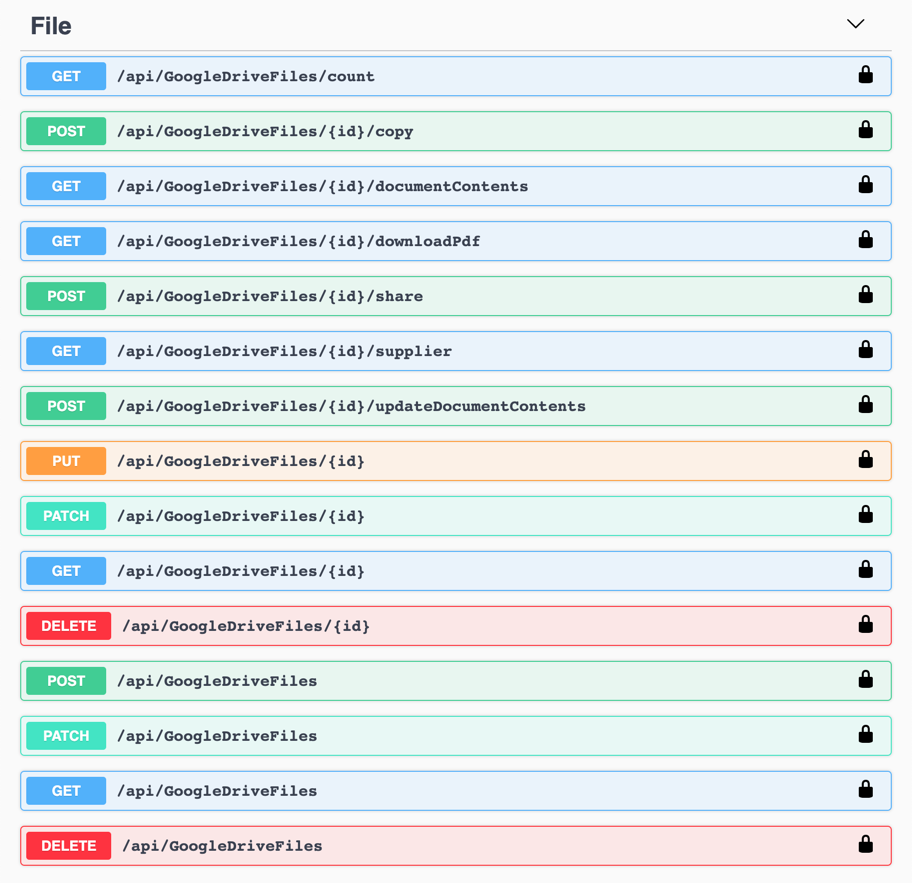
When we generate the test app, we now have a full set of Create, Read, Update and Delete REST APIs:
Configure the Data Source and Try It Out
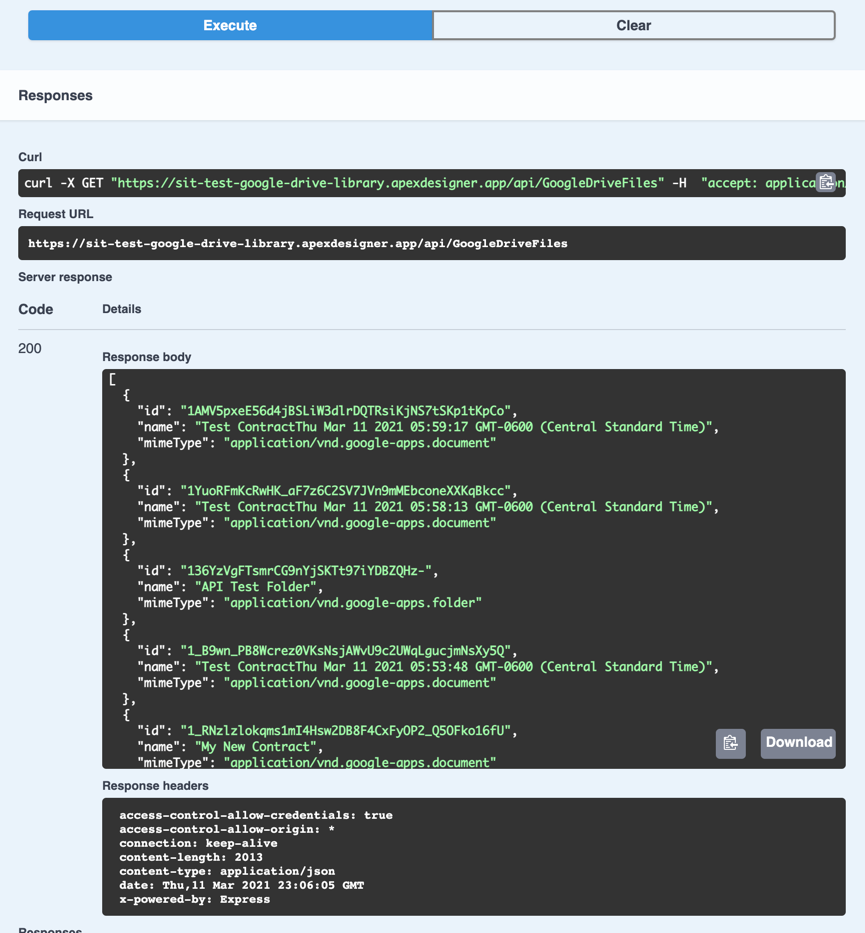
This connector uses a service account to access the Google APIs. You can read more about that here. Once you have set up your service account, you will have a JSON file containing the public/private key pair downloaded on your machine. Copy the contents of this file and paste it as the value of the "googleApiCredentialsJson" environment variable on your App Manager. Restart your app manager and open the API Explorer. At this point, we have only implemented the "all" method on the connector so only the get and get by id work. Here is a simple get in action:
Add Business Object Behaviors
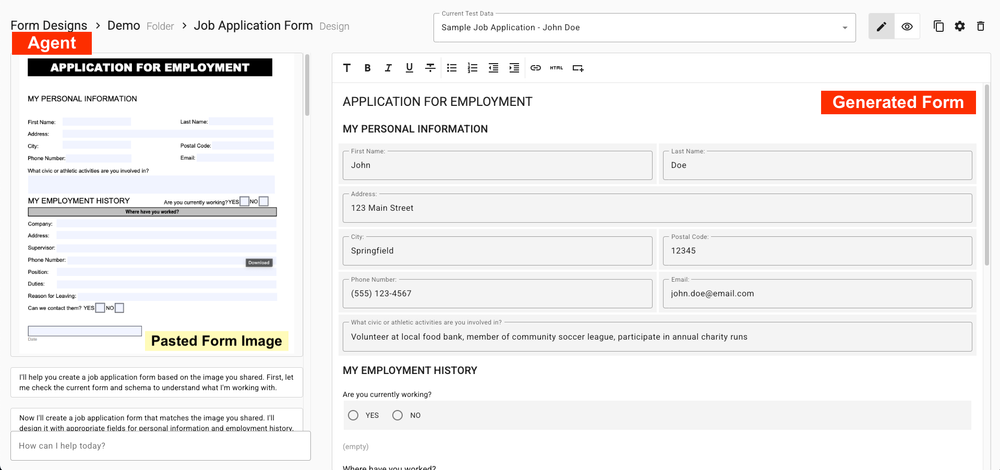
CRUD methods are great but the cool stuff usually happens in a custom behavior added to a business object. The first one we added was the "copy" method. This takes a file and a new name and makes a copy of the file. This is a simple wrapper around the Google API method which makes it easy for anyone to use copy without knowing the details of the underlying API. I added the behavior, added the name input and copied the code from an example:
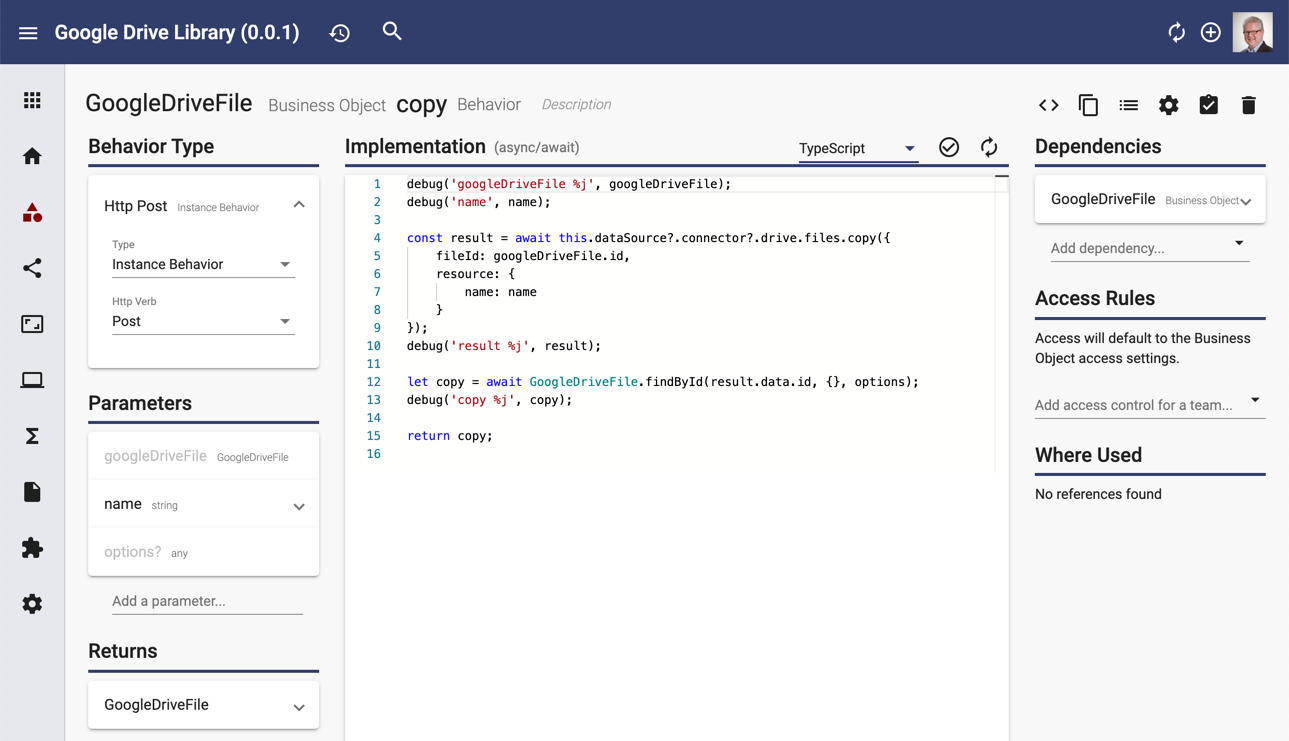
Lines 4-9 are the core with the call on line 12 reading the copy for the output. The methods that I have added so far are shown here:
The methods also show up in Explorer:
Commit to Source Control
At this point, I have a functional 0.0.1 version of my Google Drive Library. I can commit this to source control and lock the version so that other team members can use this early version while I continue developing the library.
Summary
You can quickly create an Apex Designer library that encapsulates a node.js SDK and enables others to combine models from the SDK with their app-specific models. To see the Google Drive Connector in action, take a look at the Onboard Participant Process blog post. And if you would like to learn more about Apex Designer, head over to https://apexdesigner.io and sign up for a demonstration.